I nearly talked myself out of it but I've decided to do it - join the 2014 Undersized Urbanite Contest. I had grand plans to do an Arts & Crafts Movement house but I realise I just don't have the tools and skills yet to build a house with the spacious architectural rooms I want for the project. Therefore I have put that project on hold for now.
I am going to work with a corner unit I have on hand similar to the one I am using for the Selina Rose Gallery I am doing for my sister.
This one is a bit grubby and battered. It has been played with by my niece's two boys for the last few years. It is a good blank canvas.
What will it become? - a toy shop/toy museum combined.
The bulk of the work won't get started until later in the year because I am determined to finish my sister's gallery first. She has waited long enough.
I might make a few toys now and then though to keep the interest in the project going.
I have a good pile of magazines for research. I recently picked up this big pile of Antique Toy World Magazines (I think about 115).
I am looking forward to participating in the contest and following the other entrants projects.
I also haven't forgotten about doing a giveaway. I'm still thinking about it but it will definitely happen.
Hope all is well with everyone and you are tapping into your creative side and having fun.
Until next time...
Tuesday, October 1, 2013
Saturday, September 21, 2013
I Can't Hear Myself Think!
Help. I can't hear myself think. I currently have ten 10 and 11 year olds running around the house for my daughter's birthday party. Counting down - two more hours to go when most of them leave and then just one friend staying for a sleepover. I can't believe how much noise 10 girls can make, but as long as they are having fun. In between feeding them I am contemplating whether or not to enter the 2014 Undersized Urbanite Contest to challenge myself. I don't live close to anywhere where I can pick up an old dolls house to renovate and I'm not sure I have the skills to make one from scratch, but I'd really like to challenge myself. Nothing like a deadline to get your creative juices flowing.
Sunday, September 1, 2013
A bit of this and bit of that...
AARRRHHH!!! Typical. First free weekend in weeks and I wake up Saturday morning with a full on dose of the flu my husband has had for the last couple of weeks. I spent yesterday in bed trying to shake it off. It didn't work so I figure I will at least get up and do a blog post today (Sunday), especially as I haven't done an entry for three weeks. I was really hoping to make something so I could have a show and tell but I'm afraid my head is a bit fuzzy so instead this post will just be about a bit of this.. and a bit of that...
My daughter Jamie loves it when I mention her on my blog (she keeps asking if she can have one of her own) and is especially happy when people mention her in their comments, so thank you to everyone who wished her well in her dance exams. I am happy to say Jamie passed her American Jazz Grade 4 dance exam with distinction and also did really well with her SLS (Stretch Leap Spin) exam getting 5 out of 5 stars. Below is a photo of Jamie after being presented with her SLS banner. Now we are working towards competitions in October and her teacher is putting on a large recital at the end of the year to celebrate 30 years of teaching. The life of a dance mum is never boring.
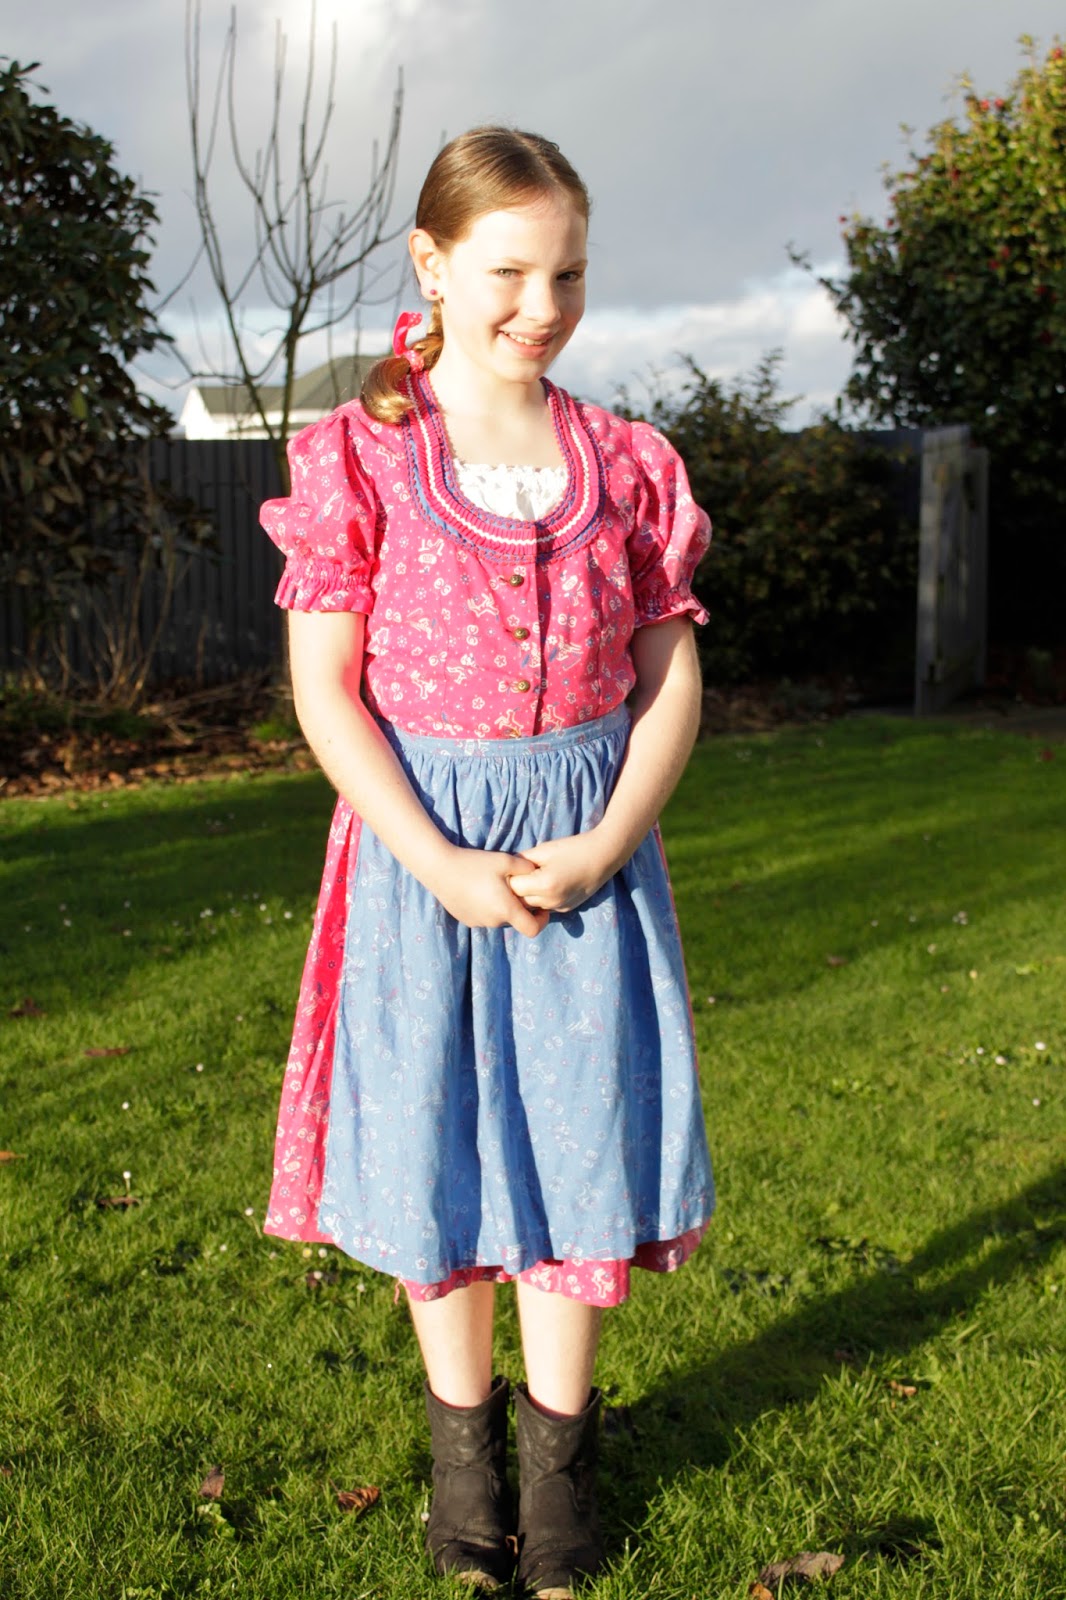
Also below is a photo of Jamie wearing a dress up costume for school last week. The costume was given to Jamie's grandmother (who grew up in England) when she was a little girl in the 1950s. It came from Germany. She has now passed it on to Jamie.
Jamie turns 11 later this month. Our birthdays are only 6 days apart. When Jamie turned 1 I was about to turn 40 so we had a big 40-1st birthday party. Now that Jamie is about to turn 11 I am about to turn?? Yes, for those quick to calculate, I'm heading for my big 50 this month. However, a 50-11th birthday doesn't sound quite right. I think I'll just let my birthday slide by this year!
Jamie wants to have a birthday party with an owl theme, so if I'm a bit quiet later this month you know what I will be doing.
On to miniatures, for those of you who follow Casey on her fabulous blog http://caseymini.blogspot.com
you will have seen her entries on weaving a rug. I recently saw two little looms on a local auction site and just had to get them to have a go. So far I have checked the boxes to make sure everything is there. Now I just need to get some cotton suitable for making a miniature woven rug.
Another recent purchase is a Bodo Hennig sewing machine. It is beautifully made with moving parts. The top small room in my vintage house 'The Laurels' is going to be a sewing room as the lady of the house makes beautiful dresses for the elite in order to be able to maintain and keep 'The Laurels' while she anxiously awaits her husband long over-due return from an overseas bird-discovery expedition.
Lately it seems a number of four legged inhabitants have been begging me for a home in my dolls houses.
First of all below is some bone china collie dogs found at a local antique shop. They are hoping to move into my Amersham house when I have restored it. To that end, I have ordered some reproduction papers.
Then another set of dogs caught my attention at the local SPCA op shop. I paid only NZ 50 cents for them. I sat them with my German furniture in my Bodo Hennig house and now they are refusing to move. Actually I think they can stay. I'll have to train the pup not to jump on the furniture though!
Then these two characters moved in to the Snow White and the Seven Dwarfs cottage.
They are actually from a Snow White and the Seven Dwarfs set, but I think from a later house than mine. The auction was for the seven dwarfs, the two animals, a lantern and some pick axes and shovels. Jamie loves my Snow White house and would like one of her own. When Jamie saw the seven dwarfs in the auction of course she wanted them. We therefore came to an arrangement to go halves in the auction and she would get the seven dwarfs and I would get the animals and the tools. Of course, now she wants us to build a residence for her dwarfs. Another thing on my to do list! Below are the tools outside the back of the Snow White cottage.
Then I found this comical miniature dog pulling along a big slipper. He has not feared the best over the years and has a slight lean. Poor thing, the least I could do for him was to take him home and find him a new residence where he could live out the rest of his life in comfort! He only cost a few cents at another op shop.
Actually I had a really good day going around the op shops the other day. Usually I am lucky to find anything of interest but the other day, along with the dogs, I also found some beautiful unfinished raised embroidery, a number of doilies that can be used for miniatures, some plastic utensils, a little pottery pot and a stone pot and a lovely piece of fabric with a miniature print. A good day at the op shops.
Finally, I bought an old tile from the local antique shop. I had been looking at them for some time and when I went in the other day there was only one left, sadly not in the best of condition. I am hoping to work in photoshop to fill in the edges and to create miniature floor tiles. Four of these tiles would create the floor tile design. I think it will make a lovely floor. Supposedly the original tiles came from a Lypiatt Park in Eastcombe, Gloucestershire.
Well it has taken a while for me to get my head around this entry and complete it and unfortunately my flu symptoms have not miraculously disappeared, so I think I will have a hot bath and then head back to bed with a lemon and honey drink for a while and play patience on my cellphone!
Hope everyone is having a great weekend. Happy September!
My daughter Jamie loves it when I mention her on my blog (she keeps asking if she can have one of her own) and is especially happy when people mention her in their comments, so thank you to everyone who wished her well in her dance exams. I am happy to say Jamie passed her American Jazz Grade 4 dance exam with distinction and also did really well with her SLS (Stretch Leap Spin) exam getting 5 out of 5 stars. Below is a photo of Jamie after being presented with her SLS banner. Now we are working towards competitions in October and her teacher is putting on a large recital at the end of the year to celebrate 30 years of teaching. The life of a dance mum is never boring.
Also below is a photo of Jamie wearing a dress up costume for school last week. The costume was given to Jamie's grandmother (who grew up in England) when she was a little girl in the 1950s. It came from Germany. She has now passed it on to Jamie.
Jamie wants to have a birthday party with an owl theme, so if I'm a bit quiet later this month you know what I will be doing.
On to miniatures, for those of you who follow Casey on her fabulous blog http://caseymini.blogspot.com
you will have seen her entries on weaving a rug. I recently saw two little looms on a local auction site and just had to get them to have a go. So far I have checked the boxes to make sure everything is there. Now I just need to get some cotton suitable for making a miniature woven rug.
Another recent purchase is a Bodo Hennig sewing machine. It is beautifully made with moving parts. The top small room in my vintage house 'The Laurels' is going to be a sewing room as the lady of the house makes beautiful dresses for the elite in order to be able to maintain and keep 'The Laurels' while she anxiously awaits her husband long over-due return from an overseas bird-discovery expedition.
First of all below is some bone china collie dogs found at a local antique shop. They are hoping to move into my Amersham house when I have restored it. To that end, I have ordered some reproduction papers.
Then another set of dogs caught my attention at the local SPCA op shop. I paid only NZ 50 cents for them. I sat them with my German furniture in my Bodo Hennig house and now they are refusing to move. Actually I think they can stay. I'll have to train the pup not to jump on the furniture though!
Then these two characters moved in to the Snow White and the Seven Dwarfs cottage.
They are actually from a Snow White and the Seven Dwarfs set, but I think from a later house than mine. The auction was for the seven dwarfs, the two animals, a lantern and some pick axes and shovels. Jamie loves my Snow White house and would like one of her own. When Jamie saw the seven dwarfs in the auction of course she wanted them. We therefore came to an arrangement to go halves in the auction and she would get the seven dwarfs and I would get the animals and the tools. Of course, now she wants us to build a residence for her dwarfs. Another thing on my to do list! Below are the tools outside the back of the Snow White cottage.
Then I found this comical miniature dog pulling along a big slipper. He has not feared the best over the years and has a slight lean. Poor thing, the least I could do for him was to take him home and find him a new residence where he could live out the rest of his life in comfort! He only cost a few cents at another op shop.
Actually I had a really good day going around the op shops the other day. Usually I am lucky to find anything of interest but the other day, along with the dogs, I also found some beautiful unfinished raised embroidery, a number of doilies that can be used for miniatures, some plastic utensils, a little pottery pot and a stone pot and a lovely piece of fabric with a miniature print. A good day at the op shops.
Finally, I bought an old tile from the local antique shop. I had been looking at them for some time and when I went in the other day there was only one left, sadly not in the best of condition. I am hoping to work in photoshop to fill in the edges and to create miniature floor tiles. Four of these tiles would create the floor tile design. I think it will make a lovely floor. Supposedly the original tiles came from a Lypiatt Park in Eastcombe, Gloucestershire.
Well it has taken a while for me to get my head around this entry and complete it and unfortunately my flu symptoms have not miraculously disappeared, so I think I will have a hot bath and then head back to bed with a lemon and honey drink for a while and play patience on my cellphone!
Hope everyone is having a great weekend. Happy September!
Saturday, August 10, 2013
German Retro
I recently bought a bulk lot of furniture through an on-line auction simply because I liked the look of it. I think I'm going through a bit of a retro phase.
When it arrived I was even more thrilled as the furniture was so much better than the photos on the auction site. The furniture is really good quality, made of good quality woods and is just "cool"! At first I thought that maybe it was hand made because of its quality but when I looked closer at some of the items there appeared to be details that looked commercial.
Imagine my surprise when I found some of the items on the web and found out they were 1950s/1960s miniature furniture by a German firm called Crailsheimer. I still don't know much about the firm and still have some research to do but I thought I'd share some photos with you.
I have temporarily housed the items in my Bodo Hennig attic/house turning it into a retro holiday pad.
I don't have a lot of time for miniatures at the moment or for keeping up with blogs, mostly because my daughter is right in the thick of dance exams which she has been working towards all year. It is always a busy time with a lot of last minute practise. She sits one exam next Friday and one next Saturday.
I am hoping to do some more work on my sister's gallery this weekend. I'll post some pictures when I have something worth showing.
Have a great weekend.
When it arrived I was even more thrilled as the furniture was so much better than the photos on the auction site. The furniture is really good quality, made of good quality woods and is just "cool"! At first I thought that maybe it was hand made because of its quality but when I looked closer at some of the items there appeared to be details that looked commercial.
Imagine my surprise when I found some of the items on the web and found out they were 1950s/1960s miniature furniture by a German firm called Crailsheimer. I still don't know much about the firm and still have some research to do but I thought I'd share some photos with you.
I have temporarily housed the items in my Bodo Hennig attic/house turning it into a retro holiday pad.
I don't have a lot of time for miniatures at the moment or for keeping up with blogs, mostly because my daughter is right in the thick of dance exams which she has been working towards all year. It is always a busy time with a lot of last minute practise. She sits one exam next Friday and one next Saturday.
I am hoping to do some more work on my sister's gallery this weekend. I'll post some pictures when I have something worth showing.
Have a great weekend.
Sunday, July 28, 2013
Woven Box Tutorial
Hi everyone. There have been a lot of favourable comments about the little woven box I made for Manu for the Christmas in July swap, so I thought I would have a go at creating my first photo tutorial.
Before I begin I will share a few lessons I learnt in the process:
1. When I make things in the future I should keep a note of how I made them.
2. When working on a tutorial where I am a little unsure of the process, I should work on two examples, then if I make a mistake on one I still have a good example to work with.
3. Take more photos than you need. It is better to find you don't need some than to find you should have taken more.
4. Start early in the morning so you don't end up trying to take the last of the photos in the gloom.
I have a habit of just making things up as I go, case in point the little box I made Manu, so it was trial and error to make a second box today for this tutorial. I made a few mistakes as I went along but hopefully this tutorial will give you an idea of how to make a woven box.
(Don't forget you can click on an image to enlarge the picture if you need to see more detail.)
Above is the old calendar I used, but alternatively you could use strips of light card. The strips I used were 4mm x 165mm.
I started this box with 8 strips. You can vary this depending on the height of the box you want. I taped one end of the strips to my work board.
Next, using some shorter strips (approx 80mm) weave between the 8 taped down strips in an under/over pattern. This photo shows the first two rows. The first row starts by going under the top strip. The second row starts by going over the top strip. I find it easier to weave on the end not taped down and then slide each strip back.
It is best to try to keep the 8 long strips close to each other at all times. You will find you will need to keep adjusting your weaving as you work to keep it tight.
Keep going until your work is of a suitable length where it can be divided into the four sides of your box, depending on the size you want your box to be. (My strip of weaving measured approximately 130mm). You should finish with a weave the same as you started with, e.g. if your first weave started with going under the top strip your last weave should also start by going under the top strip.
Fold the length of woven card in three places to create four equal sides (or as close to equal as you can).
On one side (shown on the left in the above picture) trim the ends of the strips that are on the top on the coloured side to 4mm and fold them over and glue at the back. This will secure the edge. Cut the other strips even with the edge (do not glue).
On the other side (shown on the right in the above picture) trim the ends of the strips that are on the top on the coloured side to 4mm and fold them over and glue at the back. This will secure the edge. Cut the other strips to approx 4mm lengths to create little tabs (do not glue).
(Note the above photo shows the end result on the reverse side of the box.)
Next bring the two edges together. You will find the 4mm tags will slot between two layers of card on the other side. Use a bit of glue to secure.
(You will note that where the two edges join you effectively have two similar weaves side by side. This does not really show in the finished box and I have found that this method is more secure and sturdy. However, you may want to experiment with this yourself as I am sure there are many other ways of making a woven box. This is just my method.)
To finish the top of the box cut each strip that sits on top to 4mm and fold over to the back and glue. Cut the other strips level to the edge of the box top and glue. We nearly have a box.
Next cut a square of card the same size as the bottom of your box. It may not be a perfect square as you may find each side of your box is not exactly the same length. Also cut a square slightly smaller to fit on the inside of the box. For both squares I have just glued strips of card on top for a nice finish. You might choose to cover it with more weaving. I have also edged the outside of the large square with a coloured pencil to blend the cardboard edge in with the rest of the box.
Put a generous amount of glue on the 'tabs' folded into the centre of your box and also a thin layer around the outside edge of the bottom of the box. Place the largest square on top. Then glue the smallest square inside the bottom of the box .
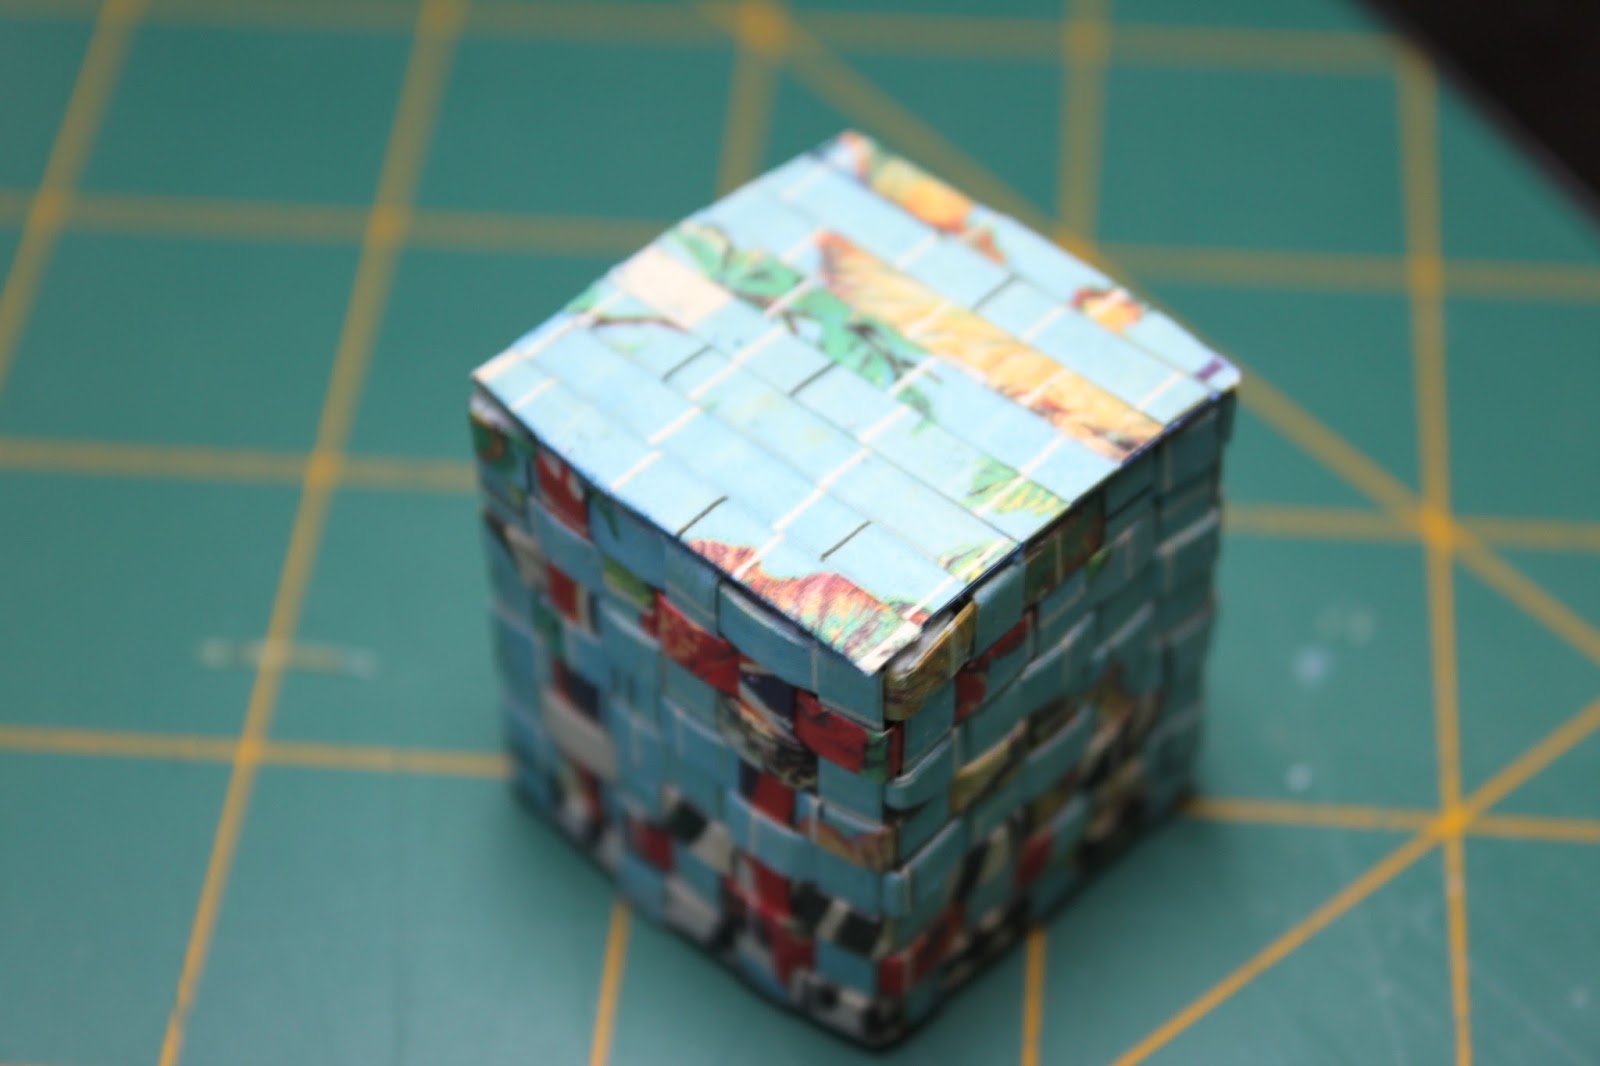
Ta Da... drum roll please... one miniature woven box.
Before I begin I will share a few lessons I learnt in the process:
1. When I make things in the future I should keep a note of how I made them.
2. When working on a tutorial where I am a little unsure of the process, I should work on two examples, then if I make a mistake on one I still have a good example to work with.
3. Take more photos than you need. It is better to find you don't need some than to find you should have taken more.
4. Start early in the morning so you don't end up trying to take the last of the photos in the gloom.
I have a habit of just making things up as I go, case in point the little box I made Manu, so it was trial and error to make a second box today for this tutorial. I made a few mistakes as I went along but hopefully this tutorial will give you an idea of how to make a woven box.
(Don't forget you can click on an image to enlarge the picture if you need to see more detail.)
Above is the old calendar I used, but alternatively you could use strips of light card. The strips I used were 4mm x 165mm.
I started this box with 8 strips. You can vary this depending on the height of the box you want. I taped one end of the strips to my work board.
Next, using some shorter strips (approx 80mm) weave between the 8 taped down strips in an under/over pattern. This photo shows the first two rows. The first row starts by going under the top strip. The second row starts by going over the top strip. I find it easier to weave on the end not taped down and then slide each strip back.
It is best to try to keep the 8 long strips close to each other at all times. You will find you will need to keep adjusting your weaving as you work to keep it tight.
Keep going until your work is of a suitable length where it can be divided into the four sides of your box, depending on the size you want your box to be. (My strip of weaving measured approximately 130mm). You should finish with a weave the same as you started with, e.g. if your first weave started with going under the top strip your last weave should also start by going under the top strip.
Fold the length of woven card in three places to create four equal sides (or as close to equal as you can).
On the other side (shown on the right in the above picture) trim the ends of the strips that are on the top on the coloured side to 4mm and fold them over and glue at the back. This will secure the edge. Cut the other strips to approx 4mm lengths to create little tabs (do not glue).
(Note the above photo shows the end result on the reverse side of the box.)
Next bring the two edges together. You will find the 4mm tags will slot between two layers of card on the other side. Use a bit of glue to secure.
(You will note that where the two edges join you effectively have two similar weaves side by side. This does not really show in the finished box and I have found that this method is more secure and sturdy. However, you may want to experiment with this yourself as I am sure there are many other ways of making a woven box. This is just my method.)
To finish the top of the box cut each strip that sits on top to 4mm and fold over to the back and glue. Cut the other strips level to the edge of the box top and glue. We nearly have a box.
To finish the bottom of the box, put a dab of glue behind all the strips that are on the inside of the box and then trim them level with the box edge.
Trim the remaining lengths and fold them inwards, as shown above, leaving reasonable sized 'tabs'.
Put a generous amount of glue on the 'tabs' folded into the centre of your box and also a thin layer around the outside edge of the bottom of the box. Place the largest square on top. Then glue the smallest square inside the bottom of the box .
Ta Da... drum roll please... one miniature woven box.
You could also easily make a round box by not folding the woven strip and joining the two ends.
In putting this tutorial together I realise there are one or two places where a few more photos might have been helpful but I think as you work with your box in front of you most steps will become fairly obvious and hopefully my ramblings will make sense. If you have any troubles at all please don't hesitate to ask me for help. I'm only a comment away.
Friday, July 26, 2013
Christmas in July Swap - What I Made for Manu
Yay, it is Friday evening in New Zealand and my weekend is just beginning.
Yesterday I wrote about the lovely swap gifts I received from Manu. Tonight I am going to write about the items I made for Manu.
Below is a few of the items I set before myself in an attempt to come up with some ideas for making miniatures from recycled items. I spread all sorts in front of me hoping something would come to mind - it took a while but eventually I came up with a few ideas.
These are the items I sent to Manu.
Starting from the top left, I made a large outdoor planter (2" x 2").
This started life as the centre of a cardboard drinks holder from a takeaway food place.
Inside the box is also a miniature paper chain made from little strips of paper approx. 3mm x 16mm linked through each other and a folder paper decoration made from two lengths of 3mm wide paper folder over each other at right angles.
The next item was a little coffee table. The table is made of a small scrap of wood for the table top with patterned paper glued on top from the inside of an envelope. Over this I poured some resin I had left over from a kit to give it a nice glazed look.
The legs are made from two plastic spacers that we get in boxes of takeaway pizza. You can see the pizza spacers in the top photo (the three pronged things). I cut one prong off each spacer and glued the rest of each spacer under the table to give it four legs.
The next item is a little coat rack to hang on the wall. This I made out of a scrap of wallpaper, which I sanded to give a worn look, an ice block stick, some haberdashery hooks & eyes and a gold pen. I have previously blogged about this item:
www.myrtlemanorminiatures.blogspot.com/2013/06/hooks-and-eyes.html
I initially wasn't going to send this to Manu as I wasn't very happy with it but I did decide to enclose it with the swap items in the end.
Also in the above picture is a little bread board. This is a very thin piece of wood covered with strips of inlay in two different colours.
The plate is made from an old New Zealand Christmas stamp depicting Christmas time in New Zealand (below left). We have a summertime Christmas in New Zealand. The picture was simply glued on thin card and shaped into the shape of a plate and then sealed with varnish.
I also enclosed a few old New Zealand Christmas stamps. Old stamps can be great for framed pictures, miniature plates, miniature photo album covers and I am sure a whole lot more.
Finally the cushion was made from a piece of embroidery cut from an old table napkin, which can be seen in the top picture. I know Manu likes pink so I wanted to include something pink amongst the swap gifts.
With much relief I had finished the items for the swap in time and I packaged them into a recycled box with a blue napkin wrapped around them. I covered the box with scraps of wallpaper left over from a project, wrote a note in a handmade card and sent it on its way from New Zealand to Italy.
Have a fun and creative weekend everyone.
Yesterday I wrote about the lovely swap gifts I received from Manu. Tonight I am going to write about the items I made for Manu.
Below is a few of the items I set before myself in an attempt to come up with some ideas for making miniatures from recycled items. I spread all sorts in front of me hoping something would come to mind - it took a while but eventually I came up with a few ideas.
These are the items I sent to Manu.
Starting from the top left, I made a large outdoor planter (2" x 2").
This started life as the centre of a cardboard drinks holder from a takeaway food place.
I sealed the planter with Gesso and then painted it with a textured railway paint. I followed this with a wash of what was supposed to be grey paint but which turned out to be green. After it was dry I lightly went over the top with some sandpaper to remove some of the green paint.
Next is a little woven box of Christmas decorations. The box itself is made of pieces of card from the 1996 calendar you can see on the top photo. I had no design, I just wove paper and played around until I had something resembling a box. I am quite pleased with the way it turned out. I hope I can make another one for myself.
The Christmas tree is simply a tinsel pipecleaner wound around in a tight circle and then you grab the centre and the end and pull them away from each other. It is finished off by placing the bottom end in a piece of wood so it can stand. I glued a little glass star on the top.Inside the box is also a miniature paper chain made from little strips of paper approx. 3mm x 16mm linked through each other and a folder paper decoration made from two lengths of 3mm wide paper folder over each other at right angles.
The next item was a little coffee table. The table is made of a small scrap of wood for the table top with patterned paper glued on top from the inside of an envelope. Over this I poured some resin I had left over from a kit to give it a nice glazed look.
The legs are made from two plastic spacers that we get in boxes of takeaway pizza. You can see the pizza spacers in the top photo (the three pronged things). I cut one prong off each spacer and glued the rest of each spacer under the table to give it four legs.
The next item is a little coat rack to hang on the wall. This I made out of a scrap of wallpaper, which I sanded to give a worn look, an ice block stick, some haberdashery hooks & eyes and a gold pen. I have previously blogged about this item:
www.myrtlemanorminiatures.blogspot.com/2013/06/hooks-and-eyes.html
I initially wasn't going to send this to Manu as I wasn't very happy with it but I did decide to enclose it with the swap items in the end.
Also in the above picture is a little bread board. This is a very thin piece of wood covered with strips of inlay in two different colours.
The plate is made from an old New Zealand Christmas stamp depicting Christmas time in New Zealand (below left). We have a summertime Christmas in New Zealand. The picture was simply glued on thin card and shaped into the shape of a plate and then sealed with varnish.
I also enclosed a few old New Zealand Christmas stamps. Old stamps can be great for framed pictures, miniature plates, miniature photo album covers and I am sure a whole lot more.
Finally the cushion was made from a piece of embroidery cut from an old table napkin, which can be seen in the top picture. I know Manu likes pink so I wanted to include something pink amongst the swap gifts.
With much relief I had finished the items for the swap in time and I packaged them into a recycled box with a blue napkin wrapped around them. I covered the box with scraps of wallpaper left over from a project, wrote a note in a handmade card and sent it on its way from New Zealand to Italy.
Have a fun and creative weekend everyone.
Thursday, July 25, 2013
Christmas in July Gift from Manu
I have now heard from Manu that she has received my swap gift, so I can now share with you the wonderful items I have received from Manu and the items I sent to her.
The Christmas in July swap was organised by Jazzi and the idea is to use recycled or found items so your only cost is postage.
Today I am just going to show you the items I received from Manu.
This is the first time I have ever entered anything like this and I wasn't disappointed. I was a little nervous on entering the swap but Manu is such a lovely swap partner and very easy to correspond with, especially with the help of Google Translate. I was so excited when I received a parcel in the post with stamps from Italy on it. I knew it was my swap gift from Manu and I couldn't get inside quick enough to open it. I think I just about trampled the dogs as I rushed in the door.
On unwrapping the parcel there inside was a beautiful little 'book' box with flowers, hearts and butterflies on it. Wrapped around the box was a ribbon with a lovely little flower arrangement. The box in itself was a wonderful gift and I am sure I can create a little scene to go inside it.
Along with the box was a lovely little note from Manu saying:
"Carissima Sharee, I send you this little thought hoping it will be to your liking. I looked at your blog often and love the precious things and you have a nice taste in your choices. And I was very pleased a swap with you. A warm hug. Manu"
On opening the box this is what I found:
I have thoroughly enjoyed the experience of this swap and it is lovely to have hand made items from another miniaturist.
How lucky am I? Thank you Manu.
A big thank you also goes to Jazzi for organising a great swap event.
In the next day or two I will write about the items I sent to Manu.
Links:
Manu - www.miniaturemanulab.blogspot.com
Jazzi - www.jazziminis.blogspot.com
The Christmas in July swap was organised by Jazzi and the idea is to use recycled or found items so your only cost is postage.
Today I am just going to show you the items I received from Manu.
This is the first time I have ever entered anything like this and I wasn't disappointed. I was a little nervous on entering the swap but Manu is such a lovely swap partner and very easy to correspond with, especially with the help of Google Translate. I was so excited when I received a parcel in the post with stamps from Italy on it. I knew it was my swap gift from Manu and I couldn't get inside quick enough to open it. I think I just about trampled the dogs as I rushed in the door.
On unwrapping the parcel there inside was a beautiful little 'book' box with flowers, hearts and butterflies on it. Wrapped around the box was a ribbon with a lovely little flower arrangement. The box in itself was a wonderful gift and I am sure I can create a little scene to go inside it.
Along with the box was a lovely little note from Manu saying:
"Carissima Sharee, I send you this little thought hoping it will be to your liking. I looked at your blog often and love the precious things and you have a nice taste in your choices. And I was very pleased a swap with you. A warm hug. Manu"
On opening the box this is what I found:
Box and contents.
The most beautiful little towels edged with lace and with fine embroidery on them, including an 'S'. Such a lovely personal touch.
A game of Ice Cream Opoly. Manu must have known I'm rather fond of ice cream! It is complete with mini money, game counters and a little dice. The box is even divided into little compartments.
The most gorgeous fabric picture of Peter Rabbit's mother mounted in a frame that Manu said she made of resin.
Two wonderful cushions and a dainty pair of floral slippers.
I had seen Manu's lovely cushions on her blog site and I was thrilled to receive two cushions from her. They are beautifully made and have the most beautiful little decorations on the corners and each is finished off with a little bow. As a surprise she used images of art work by my sister, Karen Panton, on the cushions which makes them even more special. I've sent a photo of the cushions to my sister and she thinks they are great. I think she is hoping one of the cushions might find a home in the Selina Rose Gallery.I have thoroughly enjoyed the experience of this swap and it is lovely to have hand made items from another miniaturist.
How lucky am I? Thank you Manu.
A big thank you also goes to Jazzi for organising a great swap event.
In the next day or two I will write about the items I sent to Manu.
Links:
Manu - www.miniaturemanulab.blogspot.com
Jazzi - www.jazziminis.blogspot.com
Subscribe to:
Posts (Atom)