Showing posts with label Tutorial. Show all posts

Monday, April 14, 2014

Fire Screen Tutorial - Part 2

Hi everyone. I have just got home from work and I am armed with a coffee, so on with the tutorial.

The next step is to work on the bottom of the fire surround. This is one of those projects where you can rattle through your scraps of wood to choose the wood pieces for your surrounds. The bottom piece of wood could just be a straight piece of wood or something really fancy if you want. If you are a scroll saw guru you could even create a shaped piece of wood for the bottom and top of the fire screen. I like to use a piece of dolls house architrave. Cut the piece of architrave the same width as your fire screen and hold it against the bottom of the screen to check it fits well. If you find the bottom edge of your screen isn't as straight as it could be just run it over sandpaper to get an even surface. Then paint your choice of wood with the same paint treatment as you have done the side pieces and finally glue it on to the firescreen.


Just a note: While for efficiency of time when making these screens it would be sensible to cut all pieces of wood and paint them all at the same time, I have a tendency to sand and sometimes trim the screen as I go. That is just the way I work. I prefer to cut pieces to fit as I move from stage to stage. It gives me the freedom to choose the wood and make any changes as I go (or to tidy up bad cuts or inaccurate measurements!).

The next step is the top of the screen. The possibilities for this are endless. You might like to look at fire screens on Google images for ideas. For the screen I did for my giveaway I used a Kaisercraft Wooden Flourish. I don't have any of those to hand so I am going to improvise and design a different top for this firescreen. I've looked through my wood bits and pieces and this is what I am going to use - a 5mm x 3mm strip of wood and a strip of tiny turnings.


Once you have made your choice paint the wood pieces.

(Arrhh - it is dark already - I miss daylight savings. I am just going to have my tea and I will be back to finish the tutorial. I'm determined to finish it tonight. See you soon...).

I'm back. Now glue the wood strip to the top of the fire screen to give it a tidy finish.


I then cut the two ends off the tiny turning and trimmed the centre length of the tiny turning to fit in between. Glue together and attach to the fire screen.


Lastly for the feet I use little laser cut brackets. Unfortunately I forgot to photograph them before I cut pieces out of them but I stole this picture off the internet (sshhhh, don't tell!) - they look like this:


I then cut a slit out of the right angle corner to slot the bottom of the fire screen into.


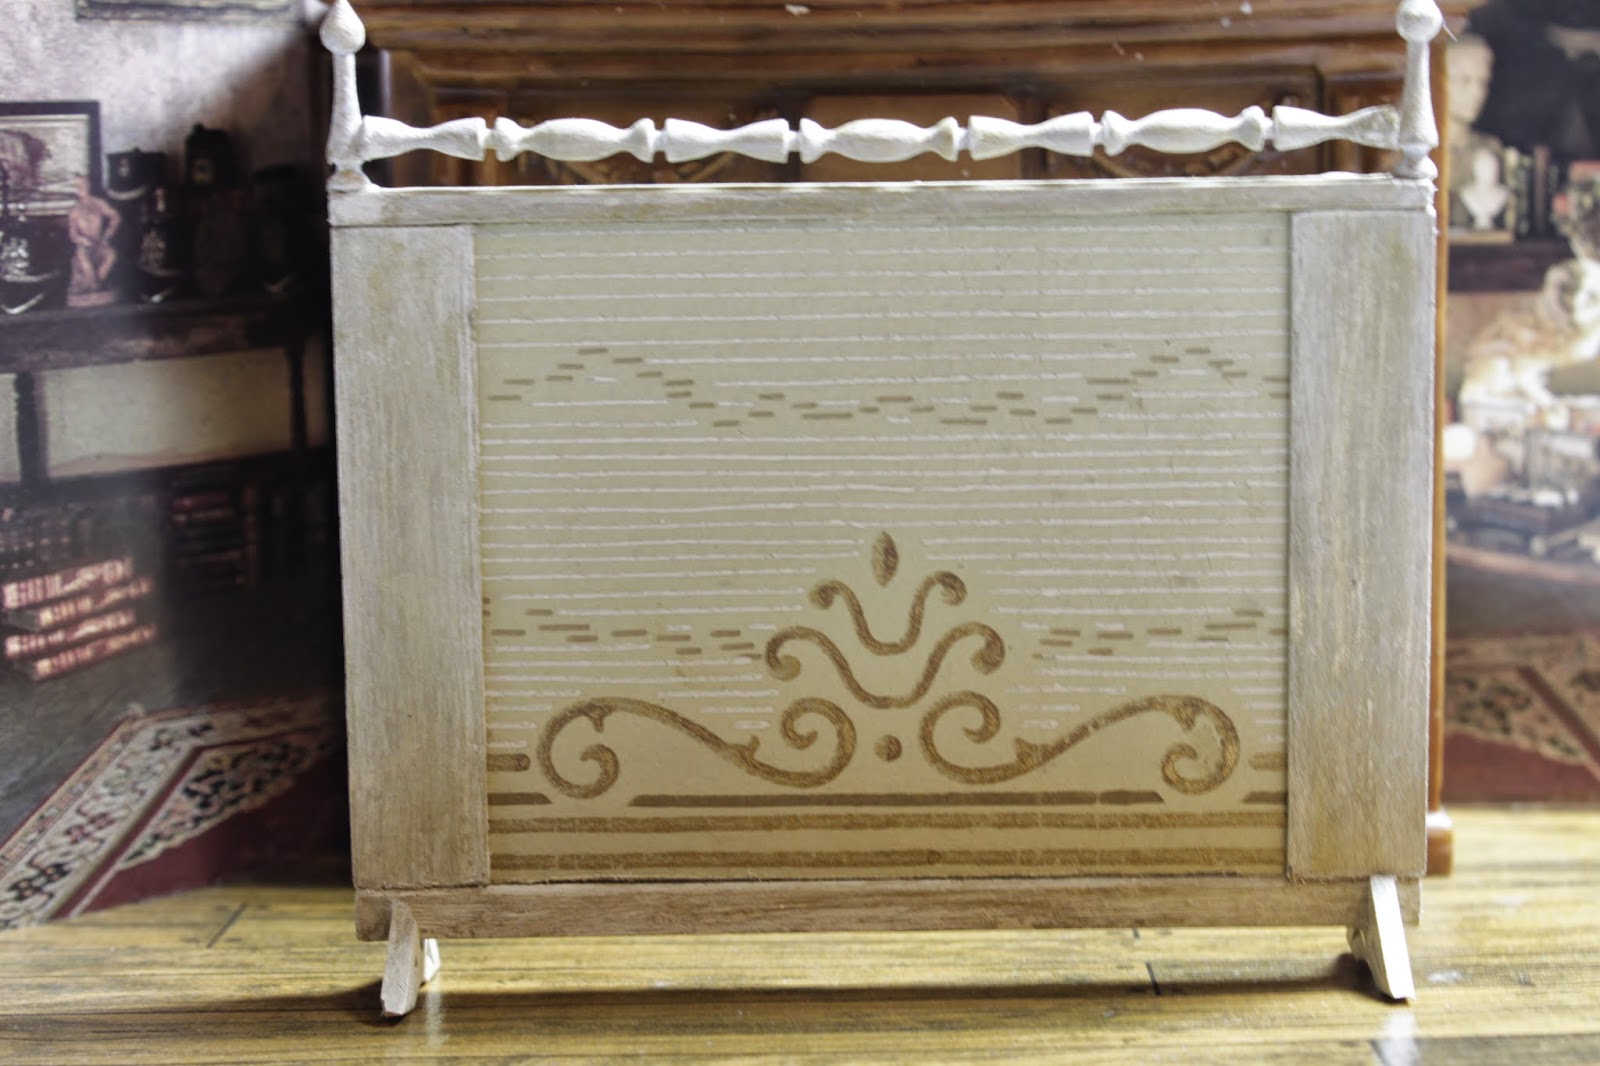
And there we have a (an aged) fire screen using antique wallpaper and scraps of wood:


I will touch up the paint work a bit tomorrow when it is light enough to see and will give the screen a spray of protective matt varnish.

And just to finish this tutorial here are the pics of my February giveaway fire screen for another version:


Anyway that is it for tonight. Hopefully you can follow my ramblings.

Tomorrow I can start working on my little Easter project.

Sunday, April 13, 2014

Fire Screen Tutorial - Part 1

Well I promised a while ago to do a tutorial on the fire screen that I made for my February giveaway pictured below:

The fire screen for this tutorial will be a bit different from the one pictured above but that is the great thing about them, you can make them to your own taste and change the details such as the feet and the top ornamentation to suit what you have to hand.

The size of your fire screen will vary depending on the size of your fireplace, so take your fireplace and work out roughly the size you want your fire screen to be. I want mine to be approximately 9.5cm wide by 7.5cm high.

Then cut out a piece of 2mm dense cardboard approximately 1.5cm smaller than you want your finished screen to be both length and widthwise, so in my case 8.0cm x 6.0cm. You could also use wood instead of card but as I am going to cover it in paper I find a dense cardboard the best option. I use a cardboard that I also use for book covers. It is strong and can be sanded if required.

When you have cut out your piece of cardboard trace around it on a piece of scrap paper and put the scrap paper away for a later step.


I like to seal my cardboard with a gesso primer. (When painting on the gesso it showed that one edge of my cardboard was very rough so I let it dry, sanded it and then touched it up with gesso again). The good thing about gesso is that it is quick drying. If you know what colour you want to paint the wooden border of your fire screen you might want to paint that colour on the edges of  your cardboard now also. Most of the edges will be hidden but I like to do this just in case a bit of the edge shows. I just ran gold pen around the edges of mine once the gesso had dried as there is gold in my design.

While your card is drying take your scrap of paper (or thin card might be more ideal) that you have traced around the card on and cut out the inside making a 'window' to view your wallpaper.


Hold the window over your wallpaper, wrapping paper, fabric or whatever you choose and when you see what you want put a dot on the four outside corners and cut out the paper. Do the same for what you are using for the back of the screen.

(When working with antique papers especially please ensure your cutting blades are always sharp. For some of the more fragile antique papers careful cutting with scissors is a better option.)

You can then carefully place your cardboard on the back of the wallpaper ensuring it is in the correct position for your design and trace around the card. You can then cut out the paper right on the line (or just fractionally inside the line).


Once your pieces are cut you can glue them to the card. I prefer to put the glue on the card and then press the papers onto it. Take particular care the paper is glued well on the edges. Let dry.
Once it is dry if there is a slight overlap of paper over the card I find an emery board will remove any excess. Also, if you find you have cut your paper slightly smaller than the card, once everything is dry it is easy to trim a little off the edge to tidy things up.

You have now completed the front and back centre of your firescreen.


Of course regarding any of these instructions many of you will have your own methods. You may decide to leave out some steps or do things a different way. Please do what works for you. This tutorial only shows my way of doing things after some trial and error and to be honest I am constantly changing my techniques as I learn new things.

Now, on to the next step of putting the side edges on the fire screen.


See that wonderful wood on the left, that is what I used for the giveaway firescreen but I don't have the right size left and not everyone has this wood so I am going to deal with the edges another way. I am going to use 3mm thick wood for the sides (by now your 2mm card with paper added to both sides is closer to 3mm) and in my case a piece of card (1mm wood strip would be preferable but I don't have any to hand).

You want to measure two lengths of 3mm thick wood exactly the same length as the side of your firescreen centre. The width of the wood can be whatever you feel will look good for your firescreen. I made mine 10mm wide. Then you want to measure two pieces of 1mm thick wood the same height but just a little wider than your 3mm thick wood (say an extra 3mm in width). That made mine 13mm wide. Glue the 3mm thick wood on top of the 1mm thick wood with one side lined up (as below).


Paint both pieces the colour you want your surround to be. You don't need too much paint on the inside 'L' as your card will be glued into that or on the ends as they will be glued to other pieces of wood.

As my antique wallpaper is a little age marked I also wanted an aged look on the wood surround. To achieve that I painted mine with a coat of gesso and waited for it to dry, I then painted on a coat of Tamiya Gold Leaf paint and when close to dry I put another coat of gesso on it. Before that dried I rubbed a toothbrush over the surface to bring out some of the gold and even took some back to the first layer of gesso. I then finished off with a little dry brushing of gold paint here and there for emphasis.

You now have three pieces for the main part of the fire screen:


Glue them together:


Unfortunately that is it for today as the light is getting difficult to work in and it is tea time. I will come back tomorrow and give you part 2.

If anybody does make the firescreen from this tutorial and has any questions or runs into any difficulty please do not hesitate to ask me any questions.

I hope you are having a great weekend. Mine is nearly over as it is 6.15 pm on Sunday night in New Zealand.

See you tomorrow!

Sunday, March 9, 2014

Rose Basket Tutorial

Here is the 'cheat' basket tutorial I promised. The basket is made out of needlepoint canvas. For this project I have used 18 count canvas because that is what I had to hand but 22 count is preferable as there is less seepage of glue through the holes. It is a great project for using up little scraps of canvas you have cut off from the edge of your needlework projects.

I am just going to give you a tutorial on the rose basket but I will show you a few other examples of things you can make with a similar technique at the end of the tutorial. There is no right or wrong way of making this or a right or wrong size. Do what works for you. I am just giving you a starting point to experiment with.

It is one of those projects where, if you are making one, you might as well make others at the same time to put aside for when you might need a basket.

Start by thinking about whether your basket is to be round or oval and what size you require the base to be. For the rose basket I chose an oval base that measures 1 inch across. I have some oval and circle stencils I use but if you don't have those just find something roughly the size you want and trace around it. I use 2mm thick cardboard. You want the cardboard to be reasonably deep to give strength to the basket.

I find when cutting small ovals or circles from thick cardboard it helps to cut into the shape with your cutting knife before cutting around it with sharp scissors.


Then cut a strip of canvas. For this basket I have cut a strip 1 inch deep. 


Wrap the canvas around the base you have just cut out and cut the canvas allowing for a small overlap of about 3mm.


If you want a handle on your basket also cut a further small strip of canvas. For this basket I cut a strip 6 cm x 1 cm. You will cut the handle down to size later.

Paint your pieces with an acrylic paint and set them aside to dry. Be quite generous with your paint and paint both sides. It doesn't matter if the holes in the canvas fill up a bit.


While your paint is drying you can have a go at making your roses.

I am using fimo for my roses because that is what I have to hand but you could also use air drying clay, thick handmade paper, cold porcelain, small dried flowers, in fact any type of flower or greenery would look great in the baskets - the possibilities are endless.

Again, if you are going to make some roses for one basket you may as well make some extras for future projects. I am just doing a quick and simple stylised rose. The technique is roll, squash and roll!

Roll a thin snake of fimo.


Squash it down very thin and then cut one edge straight which will be the bottom of the rose.


A length of 3.5cm will make a decent sized rose. To make the rose just roll the fimo between your fingers trying to keep it reasonably loose at the top edge. Just roll until you think the rose is big enough.


It is hard to explain but if you try a few you will start getting the feel for it. It looks good if you curl out some of the upper outside edge. Make sure you vary the sizes a bit and make some smaller roses and little buds as well. To make the buds just use a very short length of fimo.


You might also want to touch up the top edge with a brush of blush, eye shadow or chalk pastel powder to give a hint of another colour.

Now while you are waiting for your roses to bake and then cool down you can proceed with the next step of your basket.

Take the painted canvas for the basket. I like to make a small fold top and bottom and glue it down to both give a tidy edge and to strengthen the basket. I also take the canvas for the handle and fold it in half lengthwise and glue it together.


Then put glue around the outside edge of your cardboard base and glue the canvas to it gluing the overlap at the back.


Once that has dried cut a piece of foam or whatever you have to hand to fill the basket to a certain level ready to glue the roses on. In previous baskets I have used polystyrene painted the same colour as the basket. Today I have used a bit of black foam.


Add a layer of glue to the top of the foam.


Then with tweezers place your roses on the foam filling in as many gaps as you can.


Trim the handle to the thickness you would like it to be and glue the ends inside the basket.


Where there are little gaps I like to tuck in some paper leaves (I just cut shapes from green paper) or other greenery. It looks good having one or two leaves hanging over the outside of the basket too.

I haven't done that step tonight and it is not the best for photography because of the light so below is a photo of a couple of baskets I made for Christmas swaps.

I think one of these baskets would make a great little doorstop in a miniature house.


Of course you can use this technique for a number of things, e.g. a wood basket (excuse the match sticks - it is too dark and cold to go outside and look for twigs), a basket for a plant, a dog basket, a little tray and so many more things. These were all quickly thrown together tonight so they are not 100% and I will probably give them a touch up with some paint and a thin braid around the tray with a decorative paper base.

Just another idea . You can weave some embroidery thread along some of the rows in a different colour. I would do this after the paint has dried but before you put the basket together.


I think the next little basket I will do will be an Easter basket.

Well that is the rose basket tutorial. If you have any questions at all please do not hesitate to ask.

Tomorrow I am hoping to make some little pinwheels for Timeless Toys.

Have a great weekend everyone.

Saturday, December 21, 2013

Recital, Christmas Surprises & (Mini) Mini Tutorial

Hi all. I'm back. The Michelle Glover Academy of Dance recital has been and gone and I had my last day at work yesterday until 14 January, so hopefully after I have caught up with the housework I will have a bit of time for miniatures to get on with my sister's gallery. It has been such a hectic last few weeks with recital rehearsals, the recital and then Jamie had a number of school leaver functions (it is her last year of primary school) and her school play. We had my husband's work do last night and now I have a few days to breath before Christmas day.

The dance recital was a great experience for all of us as a family. My husband Pete was a great hit as Santa. He did so well. We both loved the interaction with the little dancers in our roles as Santa and Mrs Claus and got so many hi-fives and hugs. Jamie also did awesome in the three dances she performed in.

Below are a few photos:
 Trying on costumes prior to the recital.
 
 Jamie in her Snoopy costume.
 
 Jamie, in front, as a snow angel.
 
 Jamie, in front, as a soldier.
 
 Pete in his Santa costume.
 
Me in my Mrs Claus costume.
The things we do for our kids (and their dance teachers)!!
 
I received the giveaway I won from Sylvia of Mijbil Creatures in the post yesterday. I was blown away. I knew the characters were tiny but until I saw them for real I didn't realise how tiny or detailed they were. I don't know how she takes such beautiful photographs of them. The tallest character is only 9mm high. I am just so thrilled to have these lovely little Christmas characters in my miniature collection. They will take pride of place on a little shelf in my Christmas box when I work on it next year.

I also got an unexpected Christmas surprise in the mail yesterday, this beautiful Christmas decoration from Melli of der Pippibaren-blog. Thank you Melli. It is just beautiful. Edward thinks it should go in his Christmas box and Marlon thinks it should go in his new residence when I build one for him. I think Edward might win. It will be another item that will take pride of place in my Christmas box. Perhaps I will take a photo of it to put in Marlon's residence!


And lastly for today, a quick little tutorial:

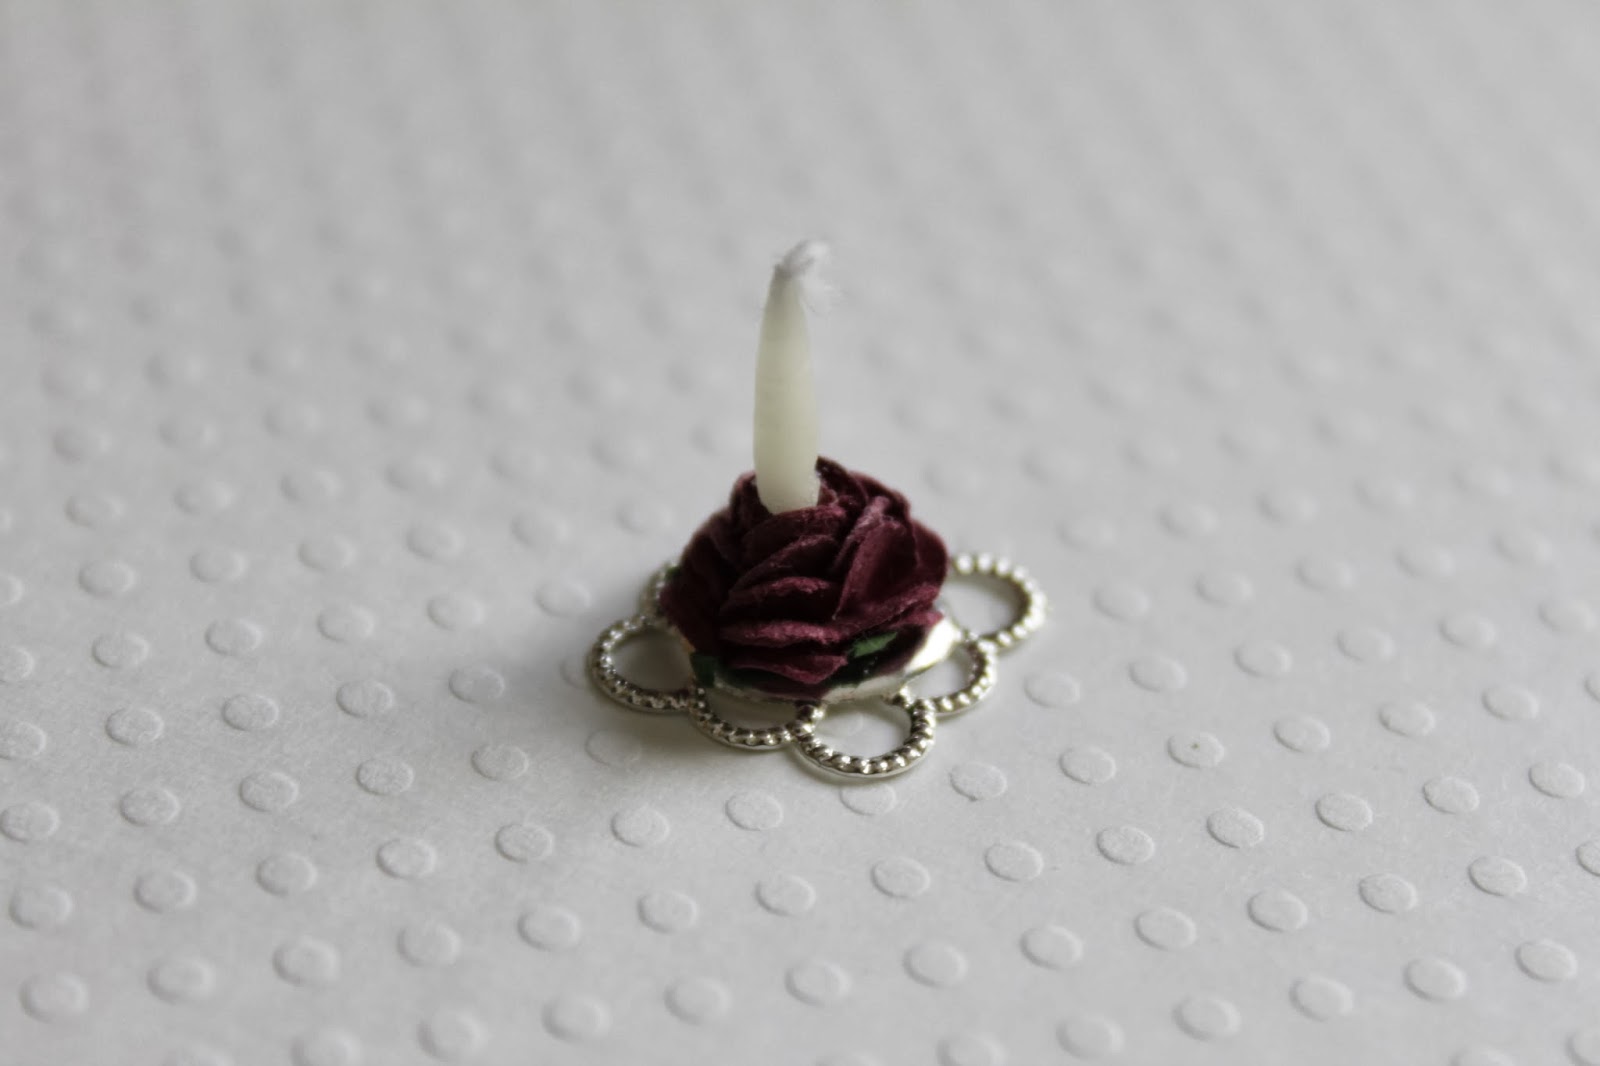
Cut the head off a small paper scrapbooking flower.
 
Glue it on to a flat jewellery finding. Drill a hole in the centre and insert
a miniature candle or a painted toothpick or similar to represent a candle.
(Preferably a candle that is a bit straighter than this one!)


I want to try to make a miniature poinsettia flower to try this technique. I think it would be lovely for a Christmas scene.
 
And finally for today, I have received my parcels from Maribel and Francesca for the 2013 Chain Christmas Swap. I am trying hard not to open them until Christmas Day but it is very hard to resist.